Create an Event
A new event is set up in four steps. After that, all participants can immediately add bills and assign their positions.
The Four Steps
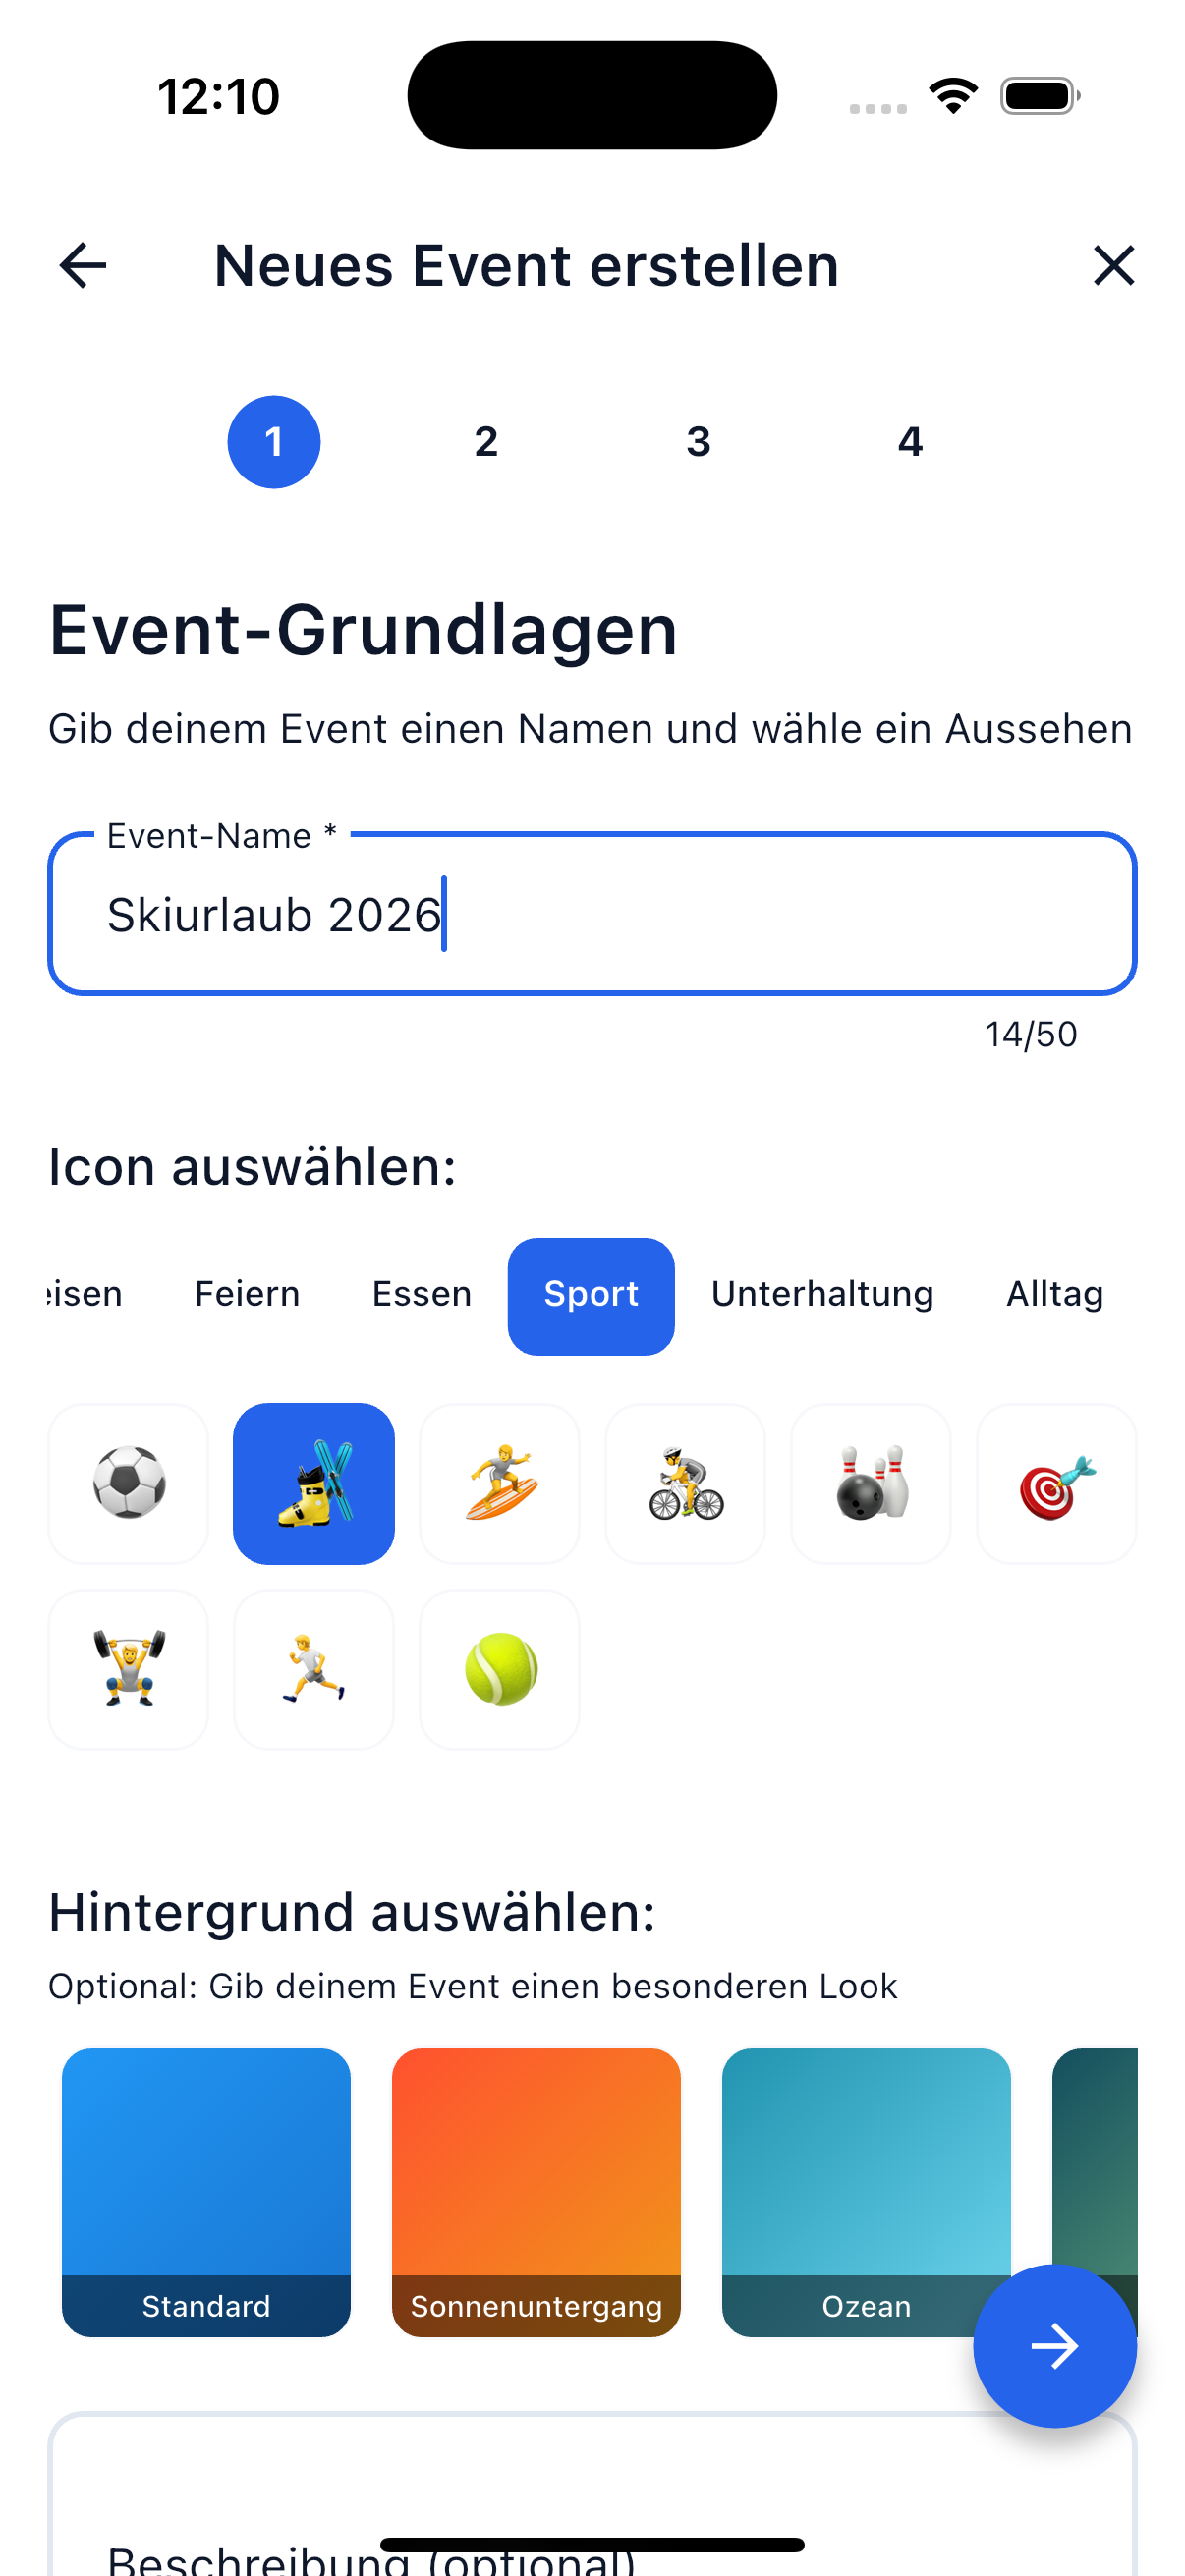
Step 1 — Info
Give your event a descriptive name, e.g.:
- "Weekend at the Lake"
- "Apartment Expenses March"
- "Team Building Summer 2026"
The name helps all participants instantly recognize the event in their list.
Step 2 — Details
Customize your event with a unique look:
- Choose icon — Pick a fitting symbol (airplane, house, party, ...)
- Select color — Give your event a color to distinguish it easily
- Location — Optional: Where does the event take place?
- Date — Optional: When does the event take place?
Step 3 — Settings
Set the parameters:
- Default currency — What currency will most expenses be in?
- Event type — Categorize your event (trip, apartment, party, ...)
Step 4 — Participants
Invite friends from your friends list and assign roles:
| Role | Permissions |
|---|---|
| Creator | Full control — can edit everything and delete the event |
| Organizer | Can manage bills, invite participants, and assign roles |
| Participant | Can create bills and assign their own positions |
Tip
Invite all participants first before creating the first bills. This way everyone can assign their positions right away and you don't need to add anyone retroactively.
After Creating
Once your event is created:
- All invited friends receive a notification
- The event appears in the event list of all participants
- Everyone can immediately add bills
- The balance is updated in real time
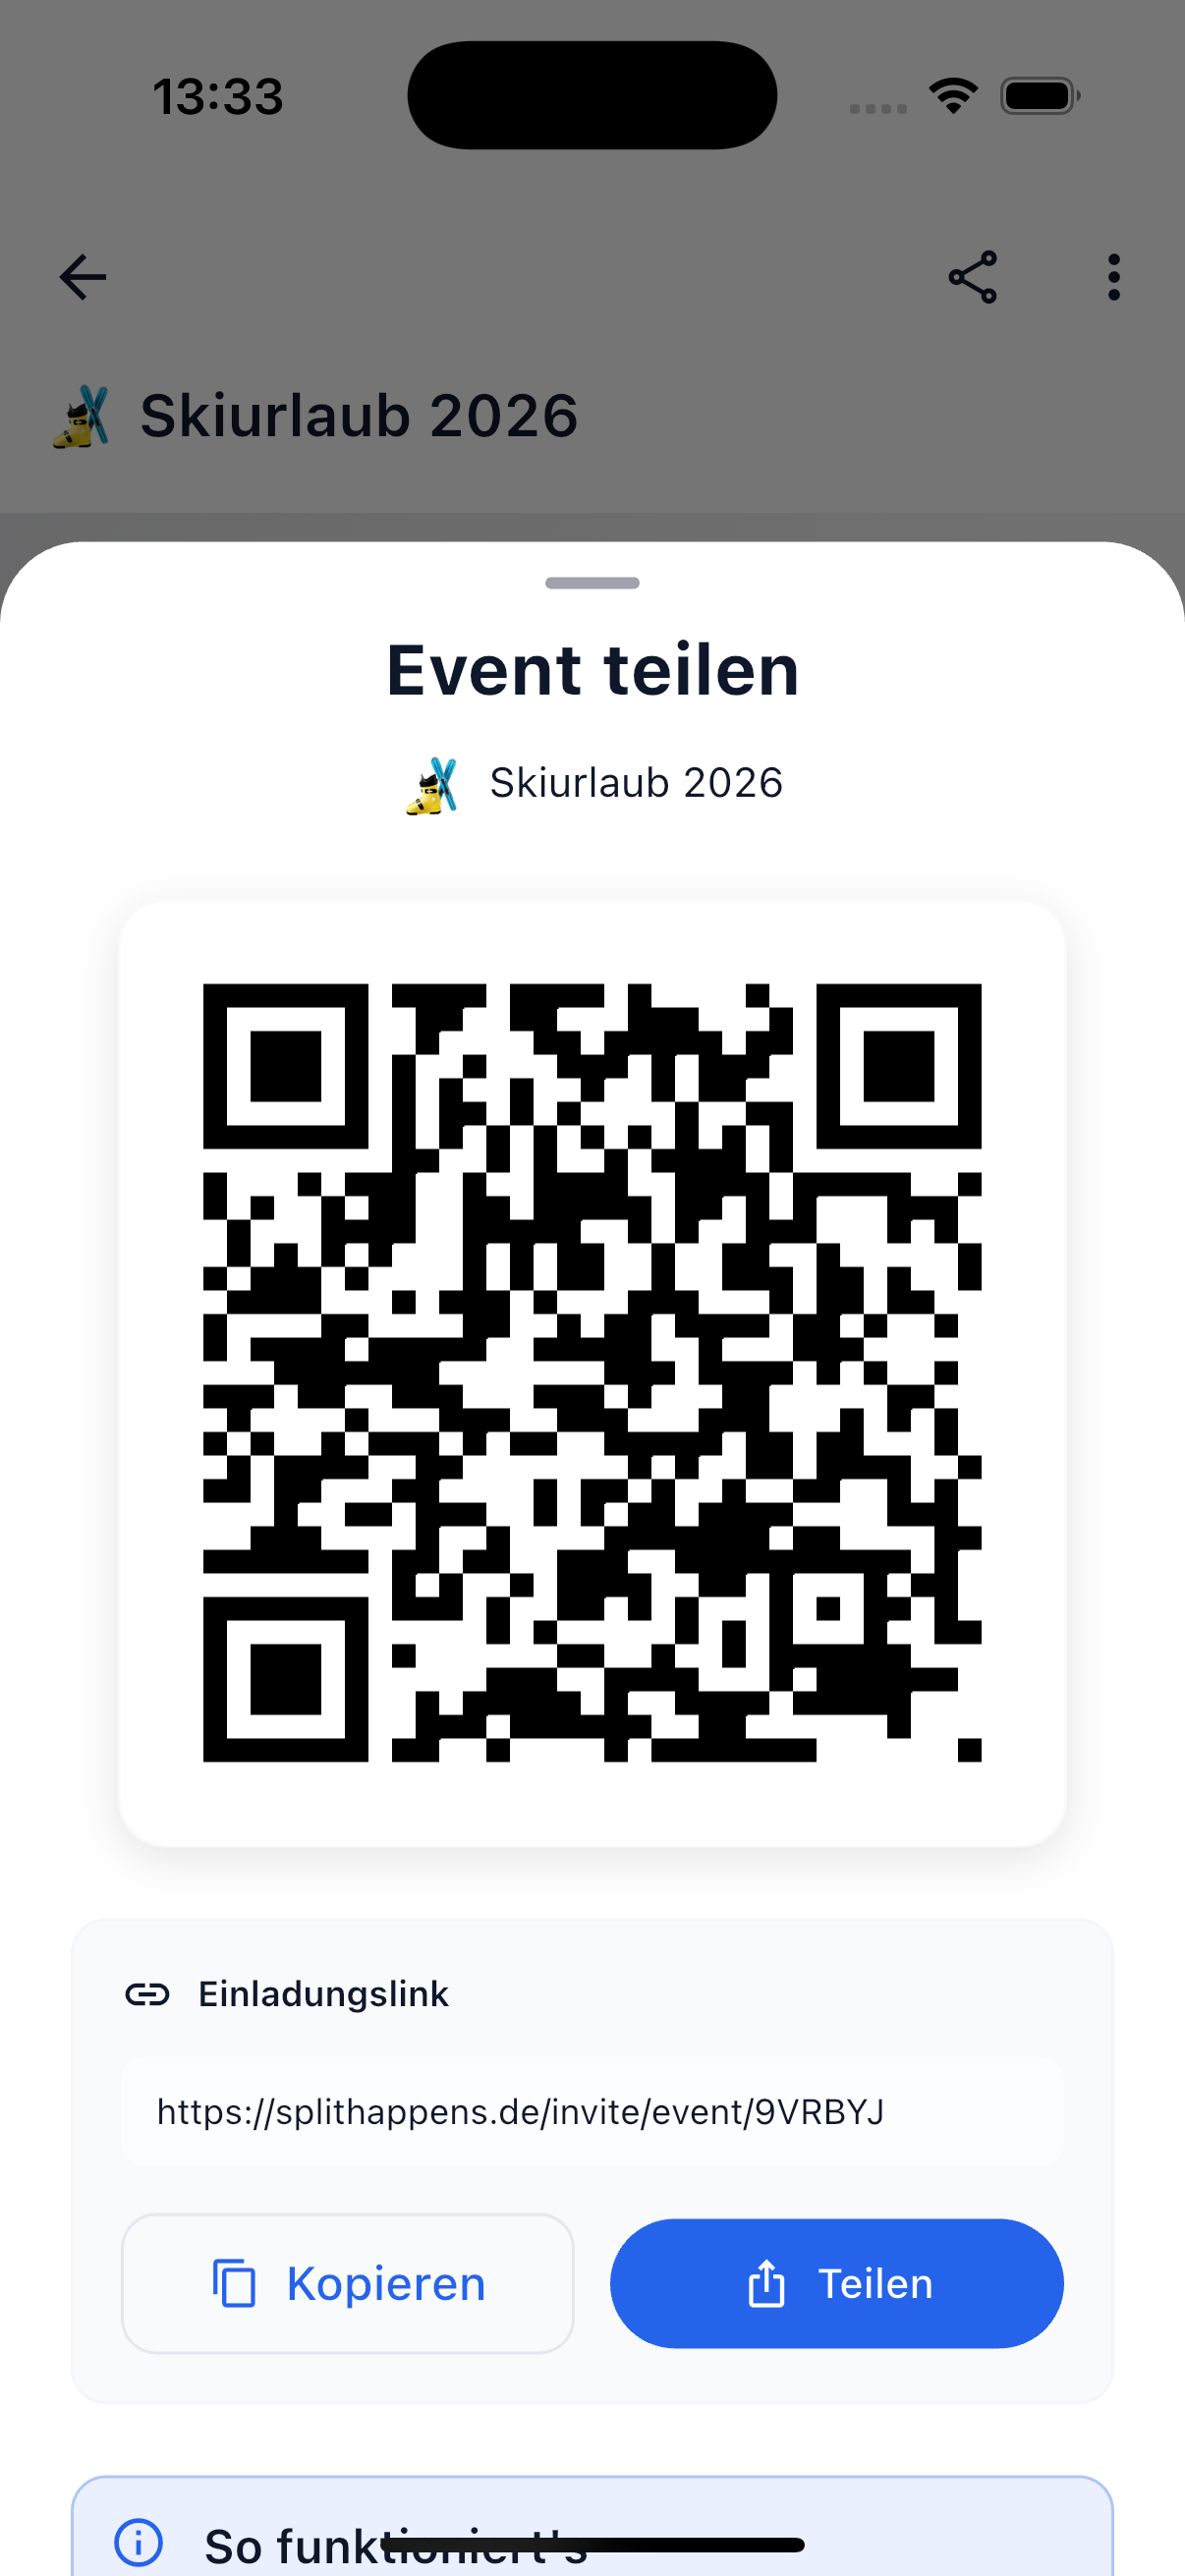
Invite More Participants
Via the share icon in the event you can invite additional people at any time — via QR code or invitation link. The link can be copied directly or shared via messenger.
Related Topics
- Events Overview — Manage your events
- Event Settlement — Understand settlement within events
- Create Bills — Create a new bill in the event